This weeks work:
Painted the underneath of the floor in bay 1 using silver Hammerite (hammered finish, because that’s what I had, to expedite fitting the lower timber frame rail. This involved drilling the forward mounting bracket for the lower side rod between bay 1 and bay 2. This is now fitted and bolted up. I cut and fitted the frame rail this afternoon, using Granville sealant in the joints rather than glue to seal them but allow flexibility. The frame rail was screwed into place with stainless screws and then primed ready for paint.
Next job was to fit the small piece of beading missing from adjacent to the cab window on the bulkhead.
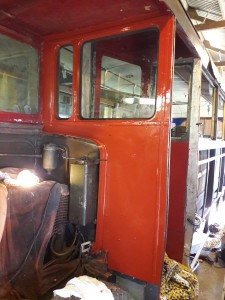
Cleaned and painted the mud shield that fits behind the nearside front wheel. I can’t fit this until I’ve undercoated the front bulkhead so I concentrated on priming the aluminium bits and cleaning excess sealant off the beading. Whilst the paint dried I started on removing paint from the small window that fits in the rearward entrance bulkhead.
Applied undercoat to the front bulkhead small window and the the aluminium cladding. Continued to strip paint from the small window that fits in the rearward bulkhead. Mostly applied paint by half-inch brush but the larger areas I used a roller. I also undercoated the flat panel in the lower part of the rearward entrance bulkhead.
Further undercoated the front bulkhead today so the periphery has had two coats and the windows and section alongside the engine only one.
Finished stripping the small window that fits in the rearward entrance bulkhead and welded a new corner onto it. Vactan applied to the rust bits on the inside face, outside face tomorrow.

